Server-Sent Events are used to transfer data from a server to connected clients. Like WebSockets, they are used mainly to transmit real-time data. In this article, you'll learn how to implement Server-Sent Events in a Node.js backend service.
Table of contents
Prerequisites
To follow along with this article, you'll need the following:
- A working version of Node.js on your machine (preferably v14+)
- A basic understanding of HTTP and Javascript
- Experience with Express.js is beneficial, but not necessary
What are Server-Sent Events?
Server-Sent Events are a one-way street for data from the server to the client. They do not require a client to establish a connection whenever it requests new data but instead operate over a single request.
If you are familiar with websockets: SSE work in a similar fashion, but just into one direction - from the Server to (a) connected Client(s). A core difference is that SSE do not require an additional UNIX socket, but can easily be integrated into existing APIs.
A classic use case for SSE is real-time applications. These would publish notifications or forward messages from external services, such as MongoDB ChangeStreams or Apache Kafka.
Before we dive into the code, let's establish a better understanding of what we're trying to implement.
Client-server connection

- We need to open a connection to the server with an HTTP GET request
- Traditionally, after sending a response, the server closes the connection again
- In the case of Server-Sent-Events, we'll keep it open instead
Server-sent messages to clients

- Whenever a serverside event occurs, we can write a message into the response
( = Stream* events ) - We can even divide messages by their event type
- If you're writing an application for the browser, you can use the standardized EventSource Web-API
* If you need a refresher on Node.js streams, you should check out 'What are Streams in Node.js?'.
Get started
With the theory out of the way, let's get to coding.
Change to a directory of your choice and initialize a new NPM project, install the necessary dependencies and create an index.js file:
# Init NPM project
$ npm init -y
$ npm i express
$ npm i -D nodemon

# Create the server file
& touch index.js
Then, add the following to your package.json script-section:
    "scripts": {
        dev": "nodemon index.js",
    },
Create the server
To keep things simple, we'll use Express to create our web server and make it listen to port 3000. We'll add our subscription function under app.get('/subscribe').
Add the following to your index.js file:
const express = require('express');

const app = express();

app.get('/', (req, res) => {
	res.send(`<!DOCTYPE html><html><body><h1>Hello SSE!</h1></body></html>`);
});

app.get('/subscribe', (req, res) => {
	// TODO: Add subscription code here
});

app.listen(3000, () => console.log('App listening: http://localhost:3000'));
You can start the server by running npm run dev in your terminal.
Create the message service endpoint
Open a client-server connection
We'll start by implementing the feature for the client-server connection. After a client sends a request, we're not responding directly with a whole body of data.
Traditionally, you would use res.send({ ... }) to send back data to the client and close the connection. Here, we're sending only the HTTP status and the response's head to the client.
HTTP headers are used to send information about a request or response.
We're informing the client about the following:
- Instead of sending a whole body of content, we're streaming data chunks
- Instead of timing the connection out, we want to keep it open
app.get('/subscribe', (req, res) => {
	res.writeHead(200, {
		'Content-Type': 'text/event-stream',
		Connection: 'keep-alive',
		'Cache-Control': 'no-cache',
	});

    // ...
});
Send messages to connected clients
The behavior of SSE does not differ a lot from standard HTTP requests. You still use the request and response objects to send data and control the connection's flow. For this example, we want to write out messages:
- whenever a user connects
- every five seconds with the current locale time
Add the following to your index.js to implement these two features:
app.get('/subscribe', (req, res) => {
    // ...

    let counter = 0;

    // Send a message on connection
    res.write('event: connected\n');
    res.write(`data: You are now subscribed!\n`);
    res.write(`id: ${counter}\n\n`);
    counter += 1;

    // Send a subsequent message every five seconds
    setInterval(() => {
        res.write('event: message\n');
        res.write(`data: ${new Date().toLocaleString()}\n`);
        res.write(`id: ${counter}\n\n`);
        counter += 1;
    }, 5000);

    // Close the connection when the client disconnects
    req.on('close', () => res.end('OK'))
});
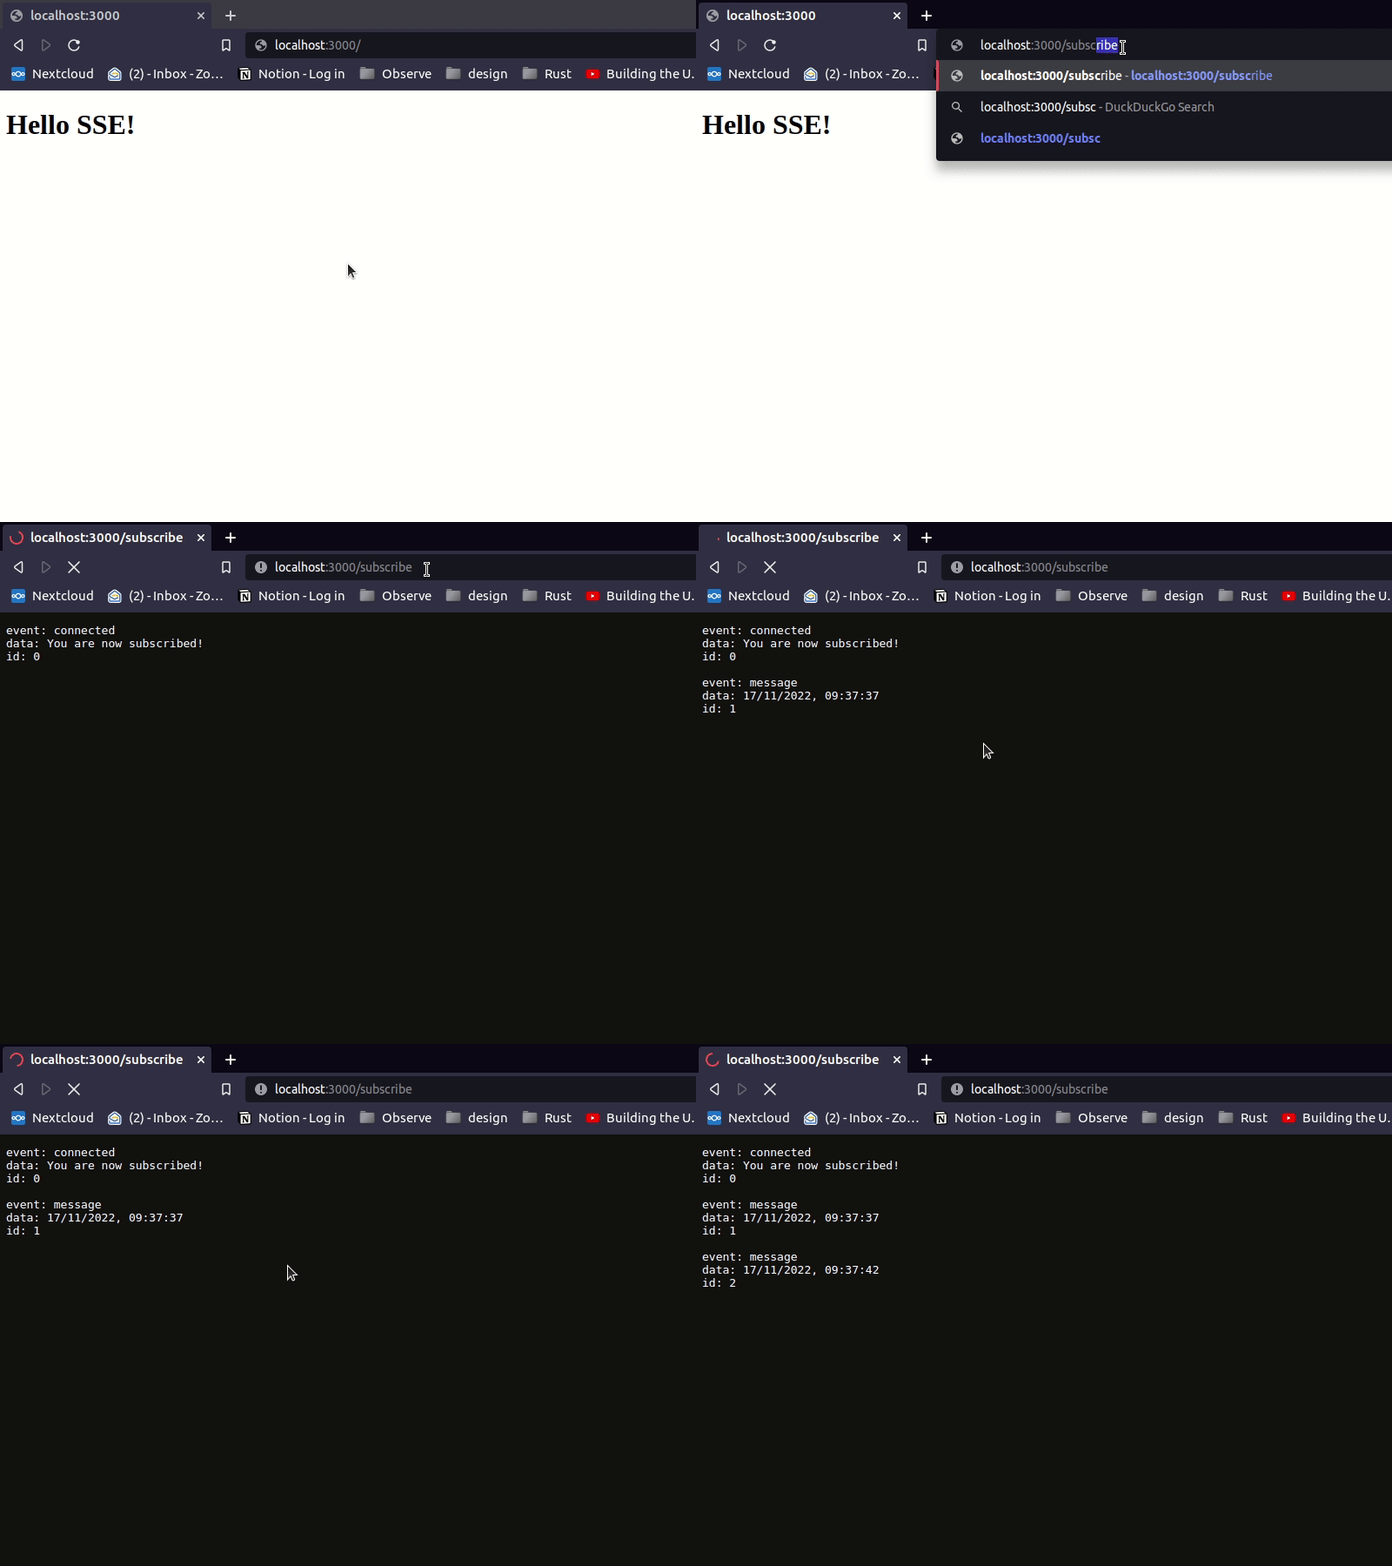
Let's try it out. Open your browser under http://localhost:3000/subscribe.

See how the loading indicator in the browser tab keeps spinning? This indicates that our connection is kept open and does not time out.
Create a client application with HTML & JS
To receive these messages in an application, we can use a standardized web API called EventSource. It will establish an HTTP connection for us, keep it open and allow us to hook into its events.
Create a static folder on the server side
We'll add a final modification in the index.js file on the server side - create a static directory from which the HTML page is served:.
const express = require('express');

const app = express();

// Remove the static HTML
// app.get('/', (req, res) => {
// 	res.send(`<!DOCTYPE html><html><body><h1>Hello SSE!</h1></body></html>`);
// });

// Use express' built-in static functionality
app.use(express.static('public'));

app.get('/subscribe', (req, res) => {
  // ... subscription code
}
Write the HTML
Next, create a folder at the root of your project called public and add a file into it called index.html.
mkdir public
touch public/index.html
Add the following to the newly created file:
<!DOCTYPE html>
<html lang="en">
	<head>
		<meta charset="UTF-8" />
		<meta http-equiv="X-UA-Compatible" content="IE=edge" />
		<meta name="viewport" content="width=device-width, initial-scale=1.0" />
		<title>Nodejs Server-Sent Events</title>
	</head>
	<body>
		<h1>Hello SSE!</h1>

		<h2>List of Server-sent events</h2>
		<ul id="sse-list"></ul>

		<script>
			// TODO: add subscription code here
		</script>
	</body>
</html>
Start the server again and navigate to http://localhost:3000 to see the page in your browser.
Write the Javascript
This implementation is simple, so we'll write inline code in our index.html file. You can alternatively create a separate .js file and try to build something yourself on this codebase.
Register at the server side
Start by adding the following subscription into the script block
<!-- HTML markup ... -->
<script>
    const subscription = new EventSource('/subscribe');
<script>
<!-- HTML markup ... -->
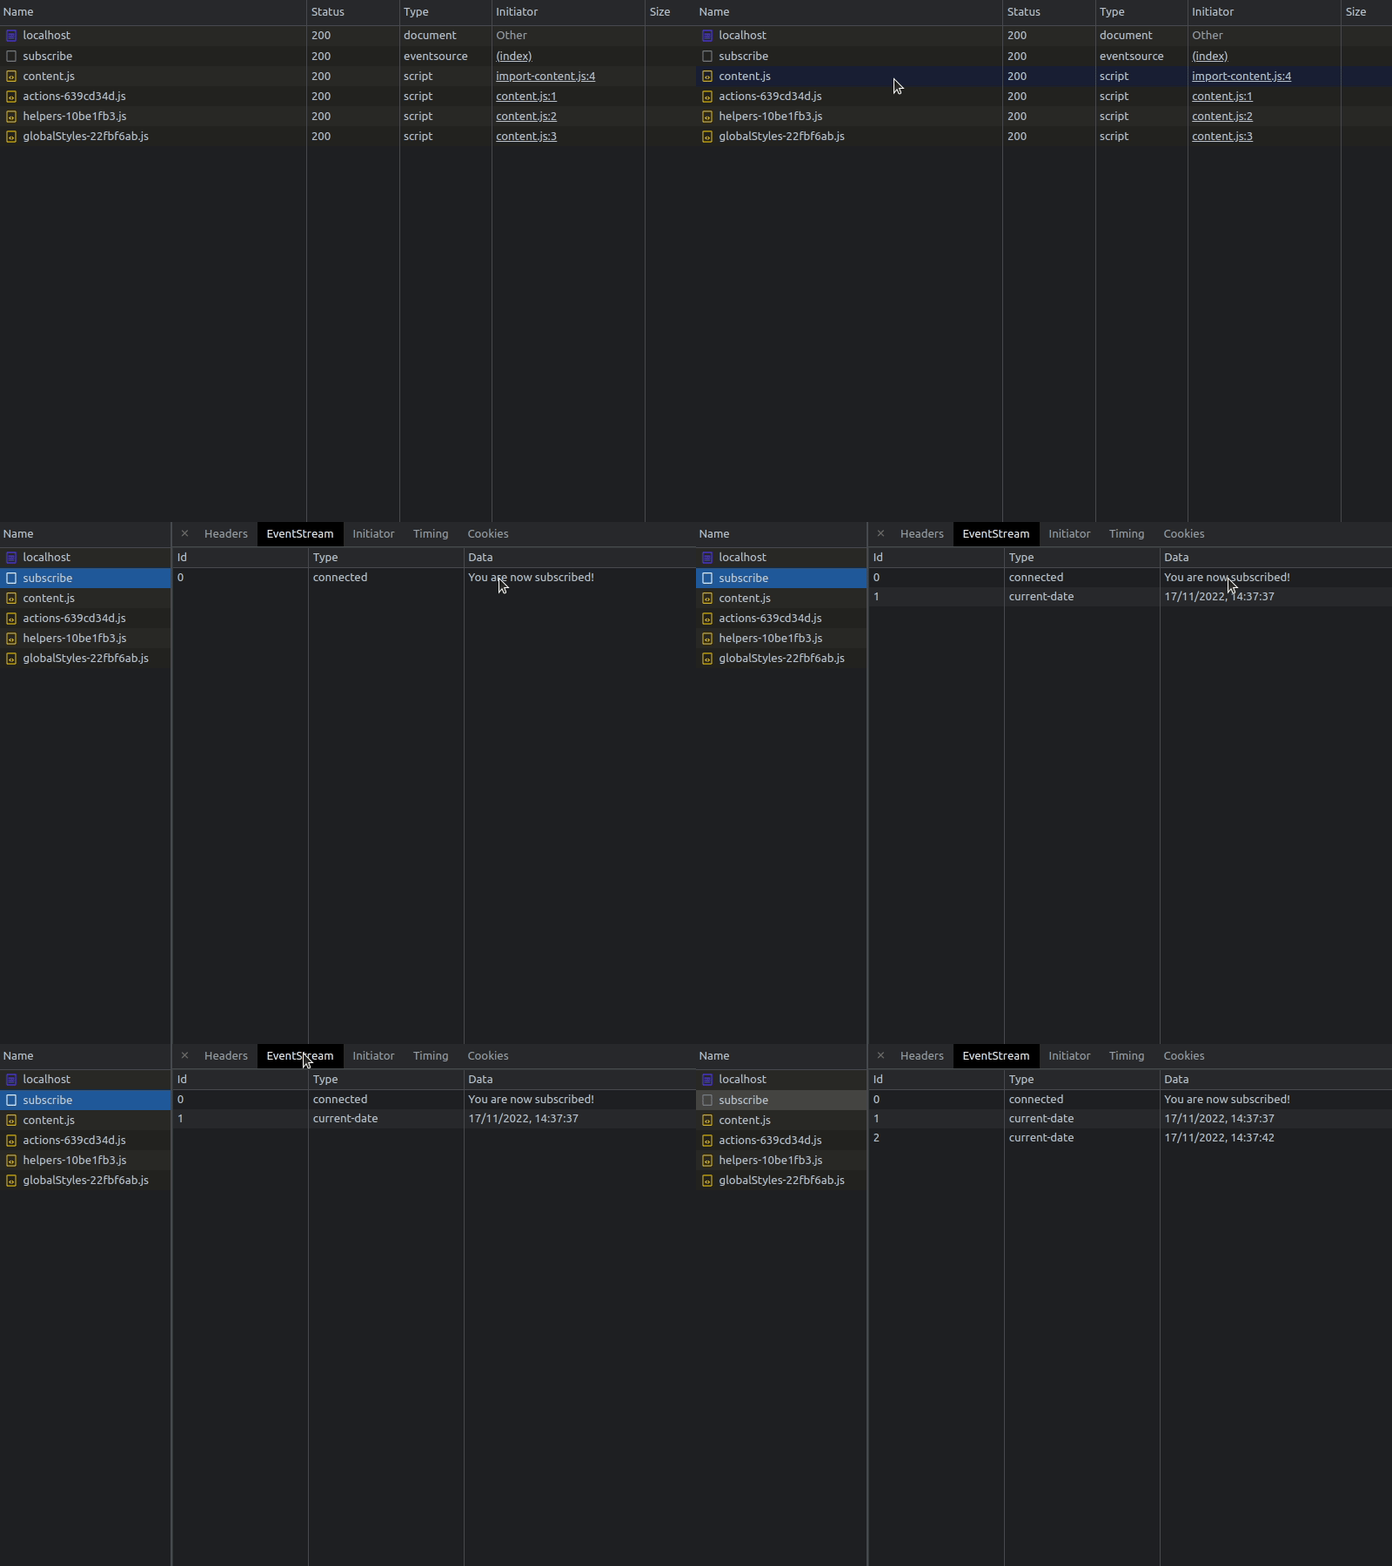
Adding the endpoint as an event source is the equivalent of a slightly modified GET request. You can see the opened event stream in your developer tools, as well as the data sent with it.

Listen to default events
EventSource provides a few default events:
openfires when the connection stream is establishederrorfires when the connection is closed unexpectedly, for example on a server restartmessagefires whenever any type of message is received from the server
You can use the addEventListener method to add callback functions to each of these.
<script>
    const subscription = new EventSource('/subscribe');

    // Default events
    subscription.addEventListener('open', () => {
        console.log('Connection opened')
    });

    subscription.addEventListener('error', () => {
        console.error("Subscription err'd")
    });

    subscription.addEventListener('message', () => {
        console.log('Receive message')
    });

    // ... other events
</script>
Define custom events
You can specify an event name on the server side and add dedicated listeners on the client side. In the initial example, we only fire the defaults connected and message. This is the combined code for the server & the client:
// Serverside implementation of event 'connected' (index.js)
res.write('event: connected\n');
res.write(`data: You are now subscribed!\n`);
res.write(`id: ${counter}\n\n`);

// Clientside event listener (main.js)
subscription.addEventListener('connected', () => {
    console.log('Subscription successful!');
});
Let's replace message it with something more self-speaking. How about current-date?
Change the code in your index.js on the server side to the following
// Serverside implementation of event 'current-date'
res.write('event: current-date\n');
res.write(`data: ${new Date().toLocaleString()}\n`);
res.write(`id: ${counter}\n\n`);
Then, in your index.html, add the following into the script block:
<script>
// Clientside implementation of event 'current-date'
subscription.addEventListener('current-date', (event) => {
    const list = document.getElementById('sse-list');
    const listItem = document.createElement('li');

    listItem.innerText = event.data;

    list.append(listItem);
});
</script>
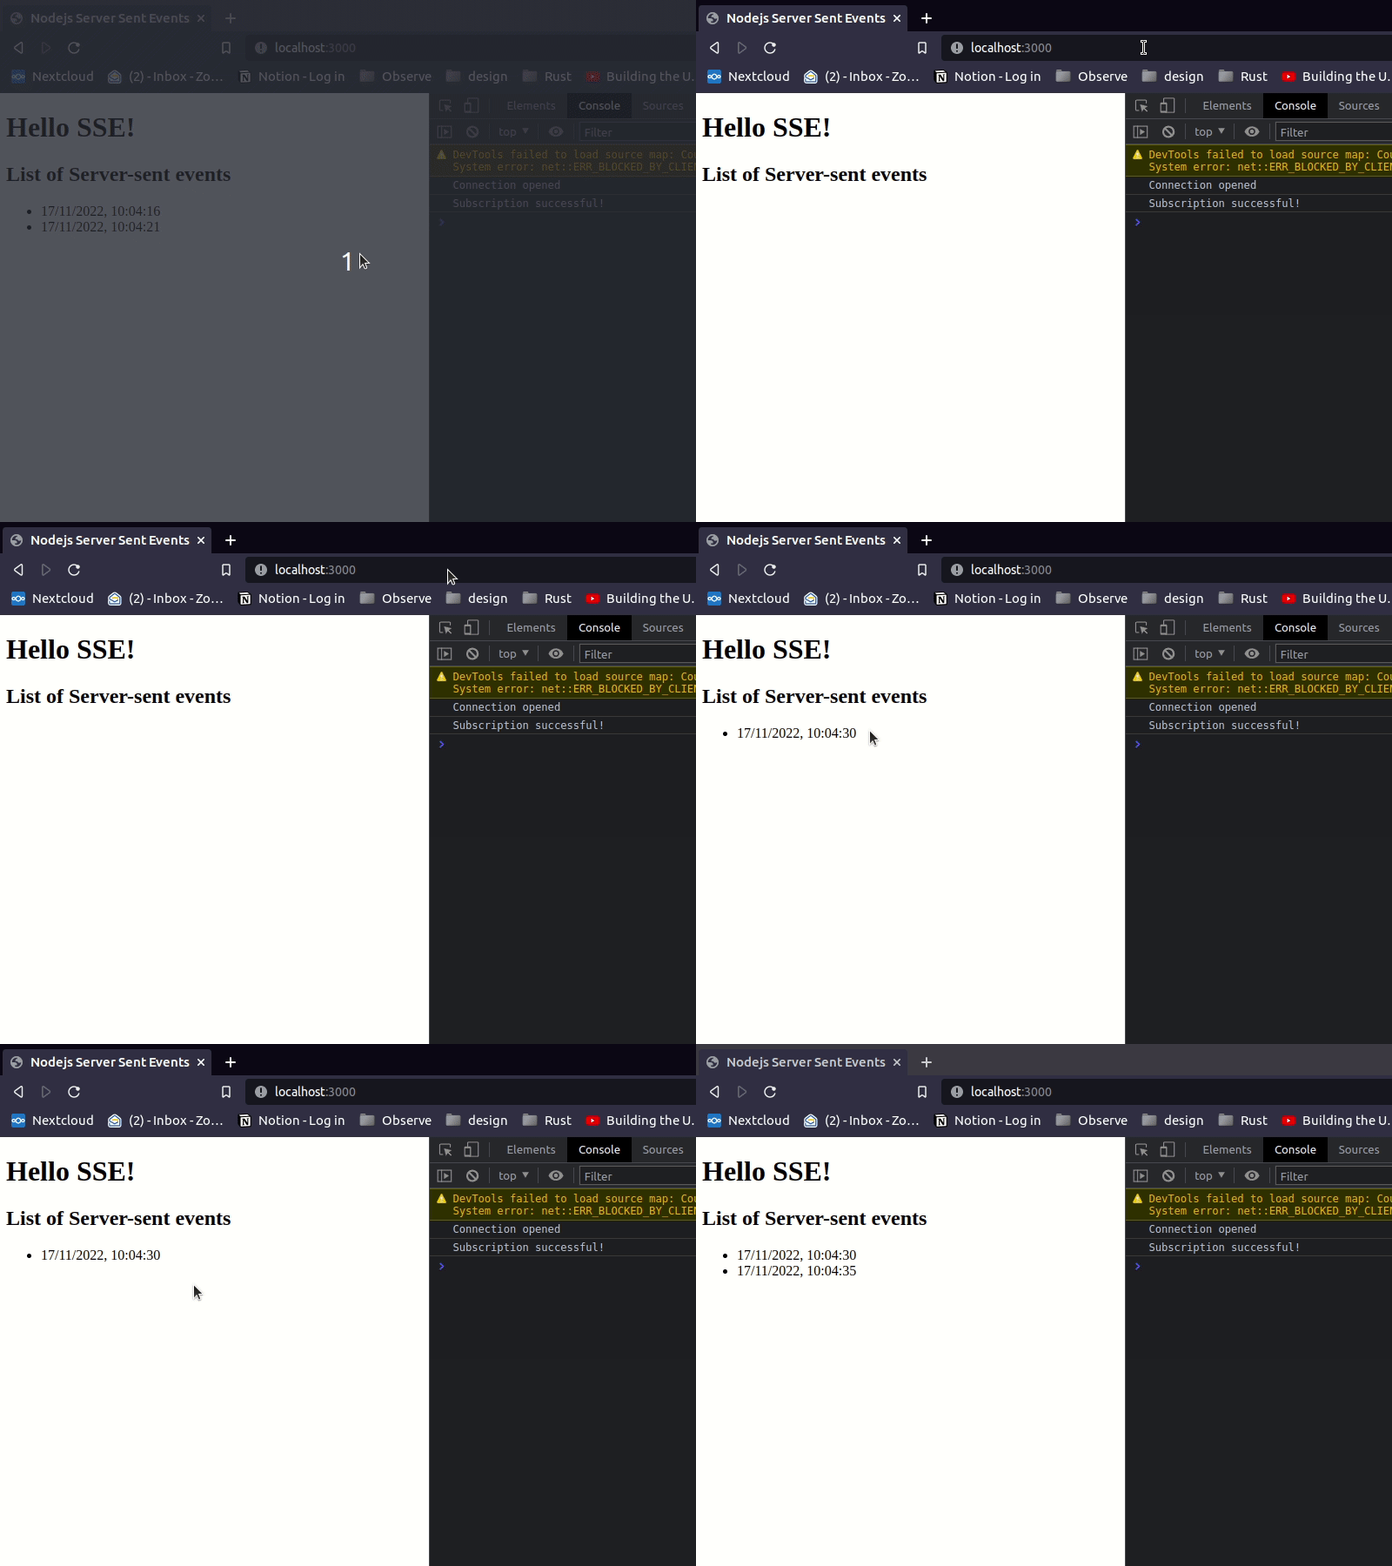
Let's go back to the browser and check if this works. You should see something like this:

If you see a similar result: Congratulations! You've just successfully implemented Server-Sent Events with Javascript
What next?
You could try and use other event sources to send data to your client application. How about a stock ticker using Yahoo Finance API? Or perhaps the database functions I mentioned earlier? Whatever it is, I hope this article helped you to get an understanding of how SSE works under the hood.


