
Making API requests is one of the first core concepts every web developer needs to wrap their head around. I decided to dedicate my first blogpost to the discipline which was challenging to learn and every now and then still grinds my gears.
Table of contents
TL:DR: Skip the theory - Take me to the code
Instead of requesting all relevant data when the page loads, APIs empower you to fetch data on demand. A well-planned API service strategy leads to improved performance and lower loading times.
To deep dive into how to incorporate one, let's take a peek behind the curtains. This article aims to give you an idea about how client-server communication works. We will build a simple Pokedex with an online API delivering the data to us.
What is an API?
An API is a part of a web server that deals with requests and responses.
That means, it is usually NOT:
- stateful (it's not a database)
- colorful (it's not a user interface)
- resourceful (it holds no business logic, but calls upon it)
The most common practice of how to interact with it is with an HTTP request. HTTP is not related to any tech stack, it works similarly in different programming languages.
For the rest of the article, I will take URLs and endpoints as synonymous. Behind each of these endpoints sits a unique business logic that queries a database based on your input, processes the result, and sends it back to the client. Their respective structure is usually similar to one another - it is put together by combining:
- A root URL, often the domain of the website, followed by /api/v1
- The endpoint's path comes after the root, like /api/v1/path/endpoint
- An optional query for more specific requests.
A full endpoint URL that returns data and we will use later in this article is:
https://pokeapi.co/api/v2/pokemon/pikachu/
Why an API?
In a nutshell, an API empowers you to handle data and backend logic decoupled from your web app/website. You can consume the same information on your homepage, a related mobile app, or serve it over another standalone web service. Using an API also empowers web engineers to focus on their domain of knowledge, either the frontend or the backend, while having to commit to only their interface.
An API empowers you to decouple the client from the server's business logic
Build an online Pokédex
We'll build a small web app around PokeApi. PokeApi is an educational service providing open and free data around Nintendo's famous handheld game.
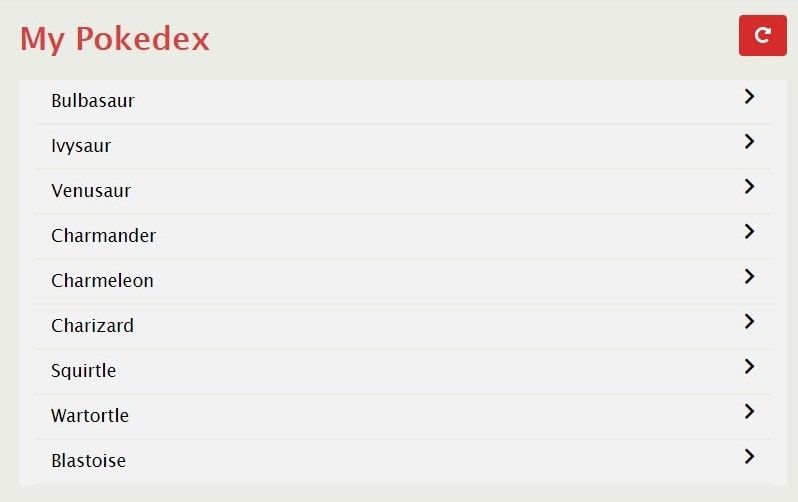
The final app will look like this:
Planning out and setup up the necessary files
Let's consider what we'd like to achieve:
- We'd like to get relevant data from the above API.
- We'd like to inject them into our HTML user interface.
Rephrase this as features:
- We'll create a simple user interface that initially shows an empty list
- We'll send an HTTP - request to the PokeApi and fill the list up with Pokemon data.
Write the HTML index and add some styles
I've prepared a Jsfiddle for you to follow along. If you're after the final version, you can find it at the end of the article
Do API calls with Javascript - Start - JSFiddle - Code Playground
Test your JavaScript, CSS, HTML or CoffeeScript online with JSFiddle code editor.
 JSFiddle
- We're creating a basic HTML skeleton, holding a heading, a button, and a list
- The styles center our content, add basic responsiveness and incorporate icons
If you prefer a local setup, launch your favorite code editor, such as Atom or VSCode, and create three files. Fill the index and style - files up with the code from the fiddle and let's go.
| File | Contents |
|---|---|
| index.html | Holds the list for our Pokedex Clone |
| style.css | Holds the styling for our user interface |
| main.js | Holds the code to make an API request |
Write the Javascript to GET data
While there is more than one way to achieve this, I will present you with one of the more contemporary ones that are available in all modern browsers - the window method fetch.
Note that fetch is not available by default on node.js (Update: Node v18+ holds an experimental fetch implementation). If you are following along with node (under v18), you need to install an npm package called isomorphic-fetch.
Asynchronous programming
Due to the asynchronous nature of Javascript, we will use an approach called Promises
You can Read more about async Javascript here
Start by adding the following code to your main.js file:
(() => {
 // Query the button dom element and assign the root path
 const buttonRefresh = document.querySelector('#refresh-pokedex-list');
 const apiRoot = 'https://pokeapi.co/api/v2';

 // Add an event listener to the button and bind the function
 buttonRefresh.addEventListener('click', async () => {
  const url = apiRoot + '/pokemon';
  const response = await fetch(url);
  const data = await response.json();
  console.log(data);
 });
})();
After that's done, open your browser's developer tools with crtl+ shift + L (cmd+etc for mac-users) then click the button 'Refresh'. You should see the following:
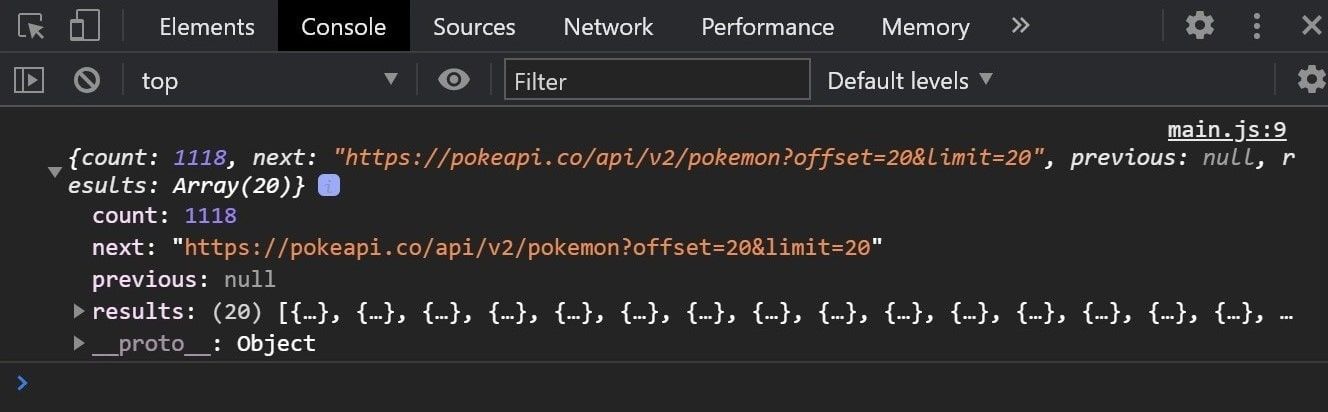
There's the requested data. What you can see in the console is a JSON object returned by the API, holding the desired data in its .results - array. When clicking the button, line per line, the following happens:
- We define the endpoint we want to receive data from. That is:
https://pokeapi.co/api/v2/pokemon. If you've tried to open it with your browser earlier, you've already seen the raw JSON. - We are using
fetch()to call this endpoint and open a data stream. - As soon as the data stream has been received, it's converted into JSON data.
- Then, we're using the browser's
console.log()to make that data visible.
So far so good. Now let's refactor this code a little to make it more readable.
Refactoring the fetch-code
Instead of doing everything in the event listener callback function, let's create a separate function. While we are at it, we will also add a query to our endpoint string. You might have noticed that PokeApi has added this automatically to our previous request.
This approach is called pagination. It prevents unnecessary pressure for the API and database.
Modify your main.js file:
(() => {
 // Define the relevant variables
 const buttonRefresh = document.querySelector('#refresh-pokedex-list');
 const apiRoot = 'https://pokeapi.co/api/v2';

 // Define the relevant functions
 getPokemonList = async (limit) => {
  const url = apiRoot + '/pokemon?limit=' + limit;
  const response = await fetch(url);
  const data = await response.json();
  return data;
 }

 // Attach the functions to the DOM elements
 buttonRefresh.addEventListener('click', async () => {
  const data = await getPokemonList(9);
  console.log(data);
 });
})();
Now we have a solid base to build on. Let's continue by binding the received data.
Write the code to create the DOM elements
Javascript allows us to manipulate the DOM a browser creates. You might have noticed that in the index.html file, there's no markup yet that indicates some kind of list or table. The structure we will create for that now looks like this in plain HTML. You can add it to the index, inside the div - tag with the id if 'Pokedex-app' to get an idea of what it'll look like later.
<ul class="pokedex-list">
 <li class="pokedex-list-item">
  <span>Pokemon 1</span>
  <i class="fas fa-chevron-right"></i>
 </li>
 <li class="pokedex-list-item">
  <span>Pokemon 2</span>
  <i class="fas fa-chevron-right"></i>
 </li>
 <li class="pokedex-list-item">
  <span>Pokemon 3</span>
  <i class="fas fa-chevron-right"></i>
 </li>
</ul>
Use the document - object to create new elements
Instead of writing the HTML in a static file, we can use a browser feature to dynamically change the appearance of our website - without reloading the whole page. If you'd like to read more on the DOM and its functionality, here's the reference.
With the following code, we will now inject elements into our website that hold the fetched data instead of just displaying them in the console. As the operation is rather long, I have added the comments directly within the code.
Add these to your main.js file in the respective section:
- Put this above the getPokemonList - function.
capitalize()is a convenience function to convert the first letter of each pokemon into uppercase.
// Join the first char of a string, uppercase, with the rest of it
const capitalize = string => {
 const stringLength = string.length;

 return string.charAt(0).toUpperCase() +
  string.split('').splice(1, stringLength - 1).join('');

 return uppercase;
};
- And put this below the getPokemonList - function.
createPokemonList()will take in the data fetched from the PokeApi and build up an element which is then added to the DOM node.
createPokemonList = data => {
 const pokedexListLength = data.length;
 const pokedexApp = document.querySelector('#pokedex-app');
 let pokedexList = document.querySelector('.pokedex-list');

 // Remove the list from the app, if it exists
 if (pokedexList) {
  pokedexApp.removeChild(pokedexList);
 }

 // Create the unordered list element and reassign the pokedexList variable
 pokedexList = document.createElement('ul');
 pokedexList.classList.add('pokedex-list');

 // Now create a list item for each item in the data array
 for (let i = 0; i < pokedexListLength; i++) {
  // Create the necessary items
  const pokedexItem = document.createElement('li');
  const pokedexItemName = document.createElement('span');
  const pokedexItemIcon = document.createElement('i');

  // Capitalize the pokemon's name and get its url
  const pokemonName = capitalize(data[i].name);
  const pokemonUrl = data[i].url;

  // Add the pokemon name and the ID to the created element
  pokedexItem.id = pokemonUrl;
  pokedexItemName.innerHTML = pokemonName;

  // Add the relevant classes
  pokedexItem.classList.add('pokedex-list-item');
  pokedexItemIcon.classList.add('fas', 'fa-chevron-right');

  // Put the items together
  pokedexItem.appendChild(pokedexItemName);
  pokedexItem.appendChild(pokedexItemIcon);

  // Then, add the item to the list
  pokedexList.appendChild(pokedexItem);
 }

 // Finally, add the pokedexList back to the app
 pokedexApp.appendChild(pokedexList);
};
- Finally, modify the event listener function to make it look like this:
buttonRefresh.addEventListener('click', async () => {
 const data = await getPokemonList(9);
 createPokemonList(data.results);
});
Wrap up: The final result
If everything went well, upon the click of the 'Refresh' - button, your application will now present you the first nine Pokemon entries of the Kanto Pokedex.
The key takeaways you should have gotten till here are:
- We have fetched some data, namely those nine pokemon entries, from an API.
- We have bound these elements to our UI and dynamically built up a list.
- On the way, we got a few hints on why we need to consider asynchronous programming when communicating with a server.
Perhaps you've also gotten an idea on how to improve, maybe to add a detail component that shows a single pokemon and its moveset? Or a search bar? Let loose your imagination, jump into the PokeApi docs and give it a shot. You can use the final code in the below Jsfiddle as a starting point.
Do API calls with Javascript - Done - JSFiddle - Code Playground
Test your JavaScript, CSS, HTML or CoffeeScript online with JSFiddle code editor.
JSFiddle